In this article, I will show you a step-by-step procedure to create markdown tables in Visual Studio Code and format the tables using markdown all in one extension. At the end of this article, you should be comfortable with creating and formatting markdown tables using the vscode.
Table of Contents
Steps To Create Markdown Tables In Visual Studio Code
A table consists of one or more column names and one or more rows(records). The first row of the table will be considered as the table header(columns). Each column is separated by a pipe(|) symbol.
In the below example, I created three columns and pipe(|) is used as the separator for each column name. The second line of the table should contain three or more dashes(—) and pipe(|) should be used as the separator. The combination of the first and second lines forms the table header.
Open the vscode, create a markdown file and copy the below example. Preview the markdown file and you will see the rendered table.
S.NO | AREA | SERVICE
---|---|---
1| WIKI | Azure Wiki
2 | VCS | Azure Repos
3 | AGILE | Azure Boards
As you can see from the above image, even though the formatting is not proper in my markdown file the vscode markdown processor renders it in a formatted way. You can address the formatting issue with the markdown all in one plugin which we will see in the upcoming section.
Markdown tables also support alignment using the colon ‘:’ symbol.
LEFT ALIGN – Add a colon to the left end of the hyphens.
S.NO | AREA | SERVICE
:---|:---|:---
1| WIKI | Azure Wiki
2 | VCS | Azure Repos
3 | AGILE | Azure Boards
RIGHT ALIGN – Add a colon to the right end of the hyphens.
S.NO | AREA | SERVICE
---:|---:|---:
1| WIKI | Azure Wiki
2 | VCS | Azure Repos
3 | AGILE | Azure Boards
CENTER ALIGN – Add a colon to both the end of hyphens.
S.NO | AREA | SERVICE
:---:|:---:|:---:
1| WIKI | Azure Wiki
2 | VCS | Azure Repos
3 | AGILE | Azure Boards
Markdown All In One extension
The markdown all in one extension offers a whole lot of productive features to work with markdown. You can format markdown tables using this plugin.
Installation Steps
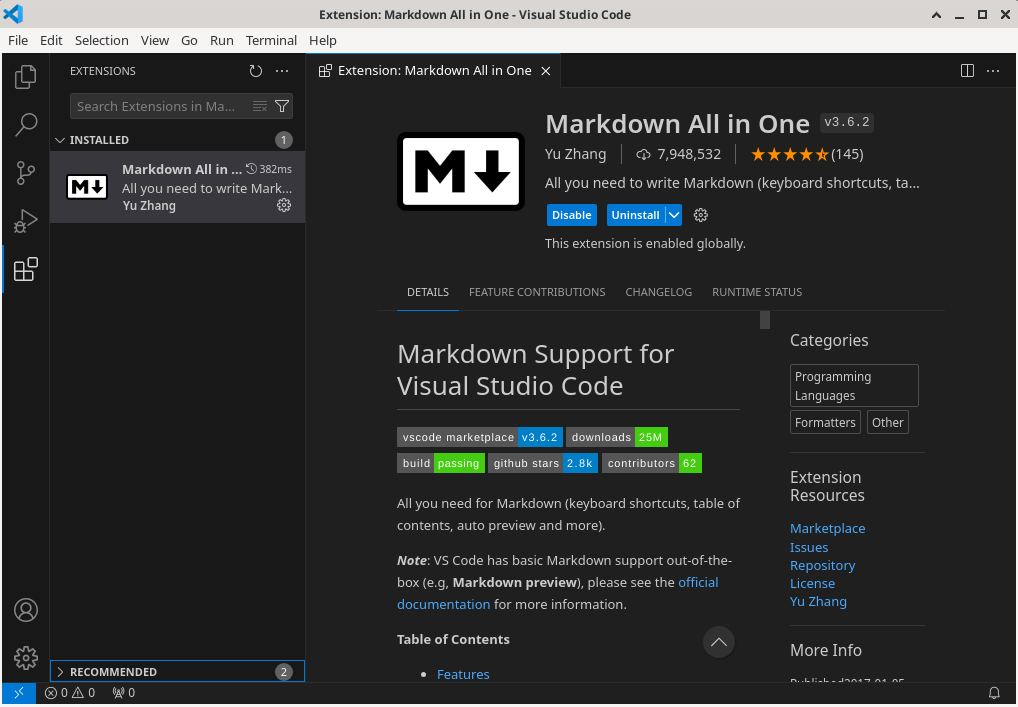
There are two ways to install markdown all in one extension extension in vscode.
VSCODE EXTENSION WINDOW – Type ‘markdown all in one’ from the vscode extension pane and click Install.
VSCODE CLI – Run the following command from your terminal to install the extension.
$ code --install-extension yzhang.markdown-all-in-oneFormat Markdown Table With Markdown All In One Extension
There are two different ways to format the markdown tables using the markdown all in one extension.
- Format at the document level
- Format the selected table.
Format Tables At The Document Level
Right-click on the markdown document and you will see options like those highlighted in the below image.
The ‘Format Document’ will format all the tables in the markdown document.
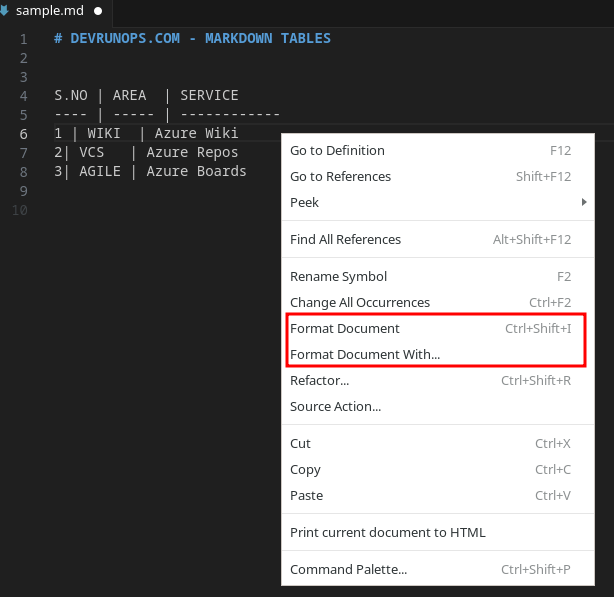
The ‘Format Document With’ will show you available formatters to format the document. This option is useful when you have installed multiple markdown plugins that do the same action.
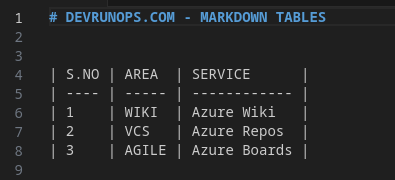
The table that you see in the below image is formatted by the plugin.
Format Selected Tables
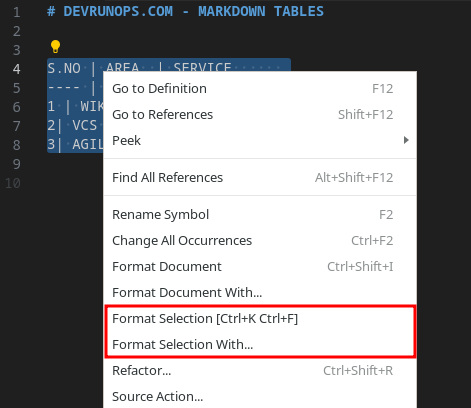
Select a table, right-click on the selection and you will get two options to format the selection.
The ‘Format Selection’ will format the selected table and the ‘Format Selection With’ allows you to choose the formatter.
Create Markdown Tables In WYSIWYG Markdown Editors
Some markdown platforms like Azure devops, and Gitlab come with WYSIWYG markdown editor. For example, the below image shows the WYSIWYG markdown editor interface for the Azure markdown wiki.

The WYSIWYG editors have an advantage over normal markdown editors. It allows you to use plain markdown syntax and icons to work with different markdown options.
In this case, the Azure devops has the option to create and format tables.
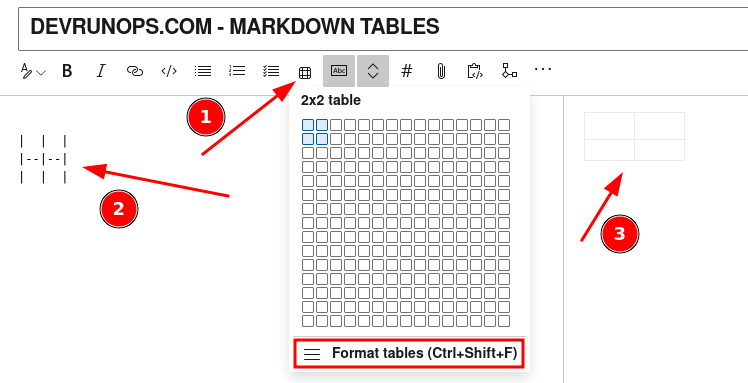
As you can see in the above image, you can use the table option to insert empty tables or format an existing table.
REFERENCE: Azure wiki related articles
Wrap Up
In this article, we have seen how to create and align markdown tables manually. We have also seen how to format the tables using markdown all in one plugin. Finally, we have also seen different options provided in the WYSIWYG Azure devops wiki to create and format tables.
