In this article, our focus will be to install VSCode in three different linux distribution families. The procedure will be the same for any distributions in the same family.
Debian -> Ubuntu, Linux Mint, PoP!_OS, Elementary OS, Xubuntu, Lubuntu, LXQT, Kubuntu, etc.
Fedora -> RHEL, Alma Linux, Rocky Linux, OpenSUSE, etc.
Arch -> Manjrao, Garuda, Arco, Reborn, etc.
Visual studio code aka VSCode is a popular ‘Integrated Developnment Environment’ developed and maintained by Microsoft. The initial release of vscode was back in 2015 and from there, it is matured as one of the leading IDE in the market.
Some of the features of VSCode are
- Freeware – VSCode is freeware and does not involve procurement or license costs.
- Cross Compatible – You can install VSCode on Windows, Linux, and MacOS.
- MIT License – The source code is released under the MIT license.
- Plugin Ecosystem – There are tons of plugins created and maintained by Microsoft, Community, and other product vendors.
- Dev Tools – In any language you work with, there will be a plugin, runtime environments, and debuggers available in VSCode.
- Version Control – Provides native support to Git.
- Debugger – Debugger is builtin to VSCode. Languages like NodeJS have native debugging support whereas for other languages like Python, you have to install additional extensions.
- Integrated Terminal – VSCode has an integrated terminal where you can create multiple panes, and run individual commands. It has tight integration with the editor where you can run a part of code directly from the editor.
- Workspace – Workspace lets you create a project-like structure where you can group multiple folders/directories and create workspace-level configurations.
- Cloud Tools – Microsoft has tightly integrated Azure tools with VSCode for a seamless development experience. You can also find official and community packages for other cloud providers like AWS, GCP, etc.
VSCode Installation Steps For Debian, Ubuntu & Derivate Distributions
There are a couple of ways to install VSCode in Debian and its derivate distribution.
- Using .deb file.
- Manually adding a repo to the apt list.
- Through Flatpak
- Through Snap
Here I will show the #1 and #2 steps where you will download the .deb file or create the repo as per the official Microsoft instructions. I am using Linux Mint 21.2 for demonstration purposes.
VSCode Installation Using .deb File
STEP 1 – Navigate to the official VSCode download page. Download the .deb file by clicking on the icon with .deb. You can also download the .deb file based on architecture.

STEP 2 – Once the download is completed, launch your terminal and navigate to the directory where the .deb file is downloaded.
$ cd ~/DownloadsSTEP 3 – Run the following command to install VSCode from the downloaded .deb file.
$ sudo apt install ./<file-name>.debNOTE: During the installation, the keyring and apt repository for vscode will be automatically installed. This way you can install updates to vscode through the apt package manager.
$ cd /etc/apt/sources.list.d/
$ ls -l vscode.list
$ cat vscode.list
VSCode Installation – Manual Steps
In this section, we will see how to create the apt repository for vscode and install keyring manually. Finally, we will install vscode.
STEP 1 – Install the dependent packages.
$ sudo apt install -y wget gpg apt-transport-httpsSTEP 2 – Add the keyring by running the following command.
$ wget -qO- https://packages.microsoft.com/keys/microsoft.asc | gpg --dearmor > packages.microsoft.gpg

$ sudo install -D -o root -g root -m 644 packages.microsoft.gpg /etc/apt/keyrings/packages.microsoft.gpg
STEP 3 – Create a separate apt repository for vscode under /etc/apt/sources.list.d/ directory.
$ sudo sh -c 'echo "deb [arch=amd64,arm64,armhf signed-by=/etc/apt/keyrings/packages.microsoft.gpg] https://packages.microsoft.com/repos/code stable main" > /etc/apt/sources.list.d/vscode.list'STEP 4 – Remove the temporary .gpg file.
$ rm -f packages.microsoft.gpgSTEP 5 – Update the package index and install the vscode package.
$ sudo apt update && sudo apt install -y code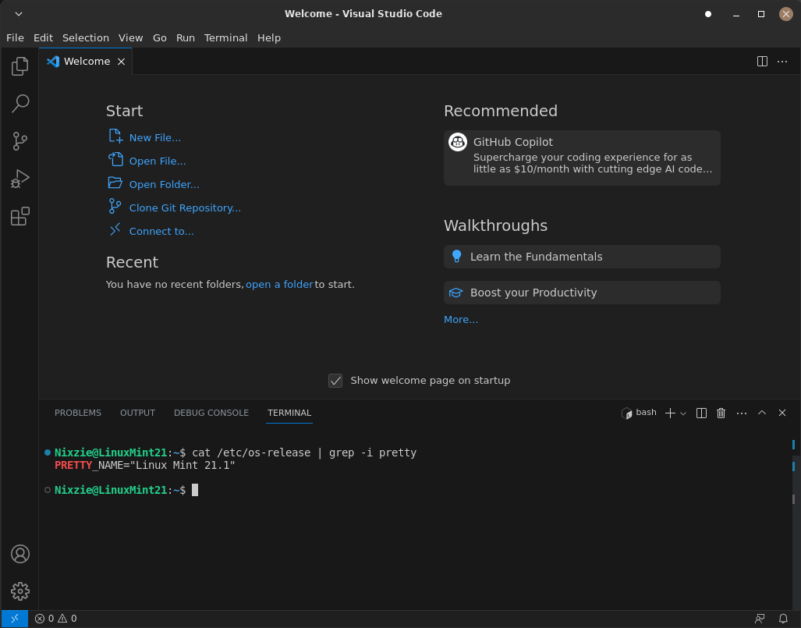
VSCode Installation Steps For Fedora And RPM Based Distributions
Similar to the installation process on debian based distributions, you can install vscode on RPM-based distributions either through the .rpm file, Manual repo setup, Flatpak, or Snap.
I will show you the steps to use the .rpm file and manual repo setup to install vscode. For demonstration purposes, I am installing vscode on Fedora 38 XFCE edition.
VSCode Installation Using .rpm File
STEP 1 – Navigate to the official VSCode download page. Download the .rpm file by clicking on the icon with .rpm. You can also download the .rpm file based on architecture.

STEP 2 – Once the download is completed, launch your terminal and navigate to the directory where the .rpm file is downloaded.
$ cd ~/DownloadsSTEP 3 – Run the following command to install VSCode from the downloaded .rpm file.
$ sudo dnf install ./<file-name>.rpmNOTE: The repository will not be automatically created when you directly install vscode with the .rpm file.
VScode Manual Installation Steps – RPM Based Distributions
STEP 1 – Install the GPG key by running the following command.
$ sudo rpm --import https://packages.microsoft.com/keys/microsoft.ascSTEP 2 – Create a vscode.repo file under /etc/yum.repos.d/ directory. You need to create this file with root privilege.
$ sudo touch /etc/yum.repos.d/vscode.repo[code]
name=Visual Studio Code
baseurl=https://packages.microsoft.com/yumrepos/vscode
enabled=1
gpgcheck=1
gpgkey=https://packages.microsoft.com/keys/microsoft.ascIf you are using SLES or OpenSUSE create the .repo file under /etc/zypp/repos.d/ directory.
$ sudo touch /etc/zypp/repos.d/vscode.repo[code]
name=Visual Studio Code
baseurl=https://packages.microsoft.com/yumrepos/vscode
enabled=1
type=rpm-md
gpgcheck=1
gpgkey=https://packages.microsoft.com/keys/microsoft.ascSTEP 3 – Update the package index and install the package.
$ sudo dnf check-update && sudo dnf install code -yIf you are using SLES or OpenSUSE then run the following command to update and install the package.
$ sudo zypper refresh && sudo zypper install code
VSCode Installation Steps For Arch-Based Distributions
You can install vscode on arch-based distribution through the Arch User Repository. You can either clone the repo and manually build it or use aur helper utility like Yay, Paru.
VSCode Installation Using Yay or Paru Utility In Arch Linux
I assume you either have yay or paru installed on your machine. Run any of the following commands to install vscode.
$ sudo yay -S visual-studio-code-bin
or
$ sudo paru -S visual-studio-code-bin
VSCode Build From Scratch In Arch Linux
The following steps will show you how to install vscode in arch linux by building the package.
STEP 1 – Install dependent packages.
$ sudo pacman -S git base-develSTEP 2 – Clone the repository hosted in the arch user repository.
$ cd ~/Downloads
$ git clone https://aur.archlinux.org/visual-studio-code-bin.git
STEP 3 – Navigate into the downloaded directory and run the makepkg command.
$ cd visual-studio-code-bin
$ sudo makepkg -si
Wrap Up
In this article, I have shown you how to install Vscode in different Linux distributions. If you have any feedback for this article, please share it through the comment section.