
This article will show you how to install the mongoDB community edition in the Ubuntu Linux distribution. I will also show you how to enable authentication and create the first user. Finally, I will insert a sample document to validate the installation.
MongoDB is a very popular document-oriented NoSQL database. It is widely used in web and mobile applications as a backend database. MongoDB offers community and enterprise versions. MongoDB also offers a cloud-based data developer platform called Atlas. There is a free version of the atlas which can be used without giving any credit card details.
We will go ahead with the community version for this article which is free of cost. The latest version at the time of writing this article is V7.
Prerequisites
As the first step, you need to set up an LTS version of the Ubuntu server or desktop version. You can set Ubuntu on top of any hypervisor like Virtualbox, KVM, etc. If you wish to automate the VM setup as well as the MongoDB setup you can use the vagrant to spin up the virtual machine and use the vagrant shell provisioner to automate the setup.
Step By Step Instruction To Setup MongoDB In Ubuntu LTS
STEP 1 – Ensure the package index is updated and all the packages are upgraded to the latest version.
$ sudo apt update && sudo apt upgrade STEP 2 – The package gnupg and curl is recommended to be installed. Here I am adding additional packages that will help you when working with the Ubuntu server
$ sudo apt install -y gnupg curl wget net-tools iputils-ping plocate sysstat vimSTEP 3 – Import mongodb gpg key.
curl -fsSL https://pgp.mongodb.com/server-7.0.asc |sudo gpg -o /usr/share/keyrings/mongodb-server-7.0.gpg --dearmorSTEP 4 – Create the repo list in /etc/apt/sources.list.d by running the following command. Change the <release-name> as per your distribution.
- If you are running Ubuntu 20.04 Focal change the release name to focal.
- If you are running Ubuntu 22.04 Jammy change the release name to jammy.
# Syntax

echo "deb [ arch=amd64,arm64 signed-by=/usr/share/keyrings/mongodb-server-7.0.gpg ] https://repo.mongodb.org/apt/ubuntu <release-name>/mongodb-org/7.0 multiverse" | sudo tee /etc/apt/sources.list.d/mongodb-org-7.0.list

# 22.04 Jammy

echo "deb [ arch=amd64,arm64 signed-by=/usr/share/keyrings/mongodb-server-7.0.gpg ] https://repo.mongodb.org/apt/ubuntu jammy/mongodb-org/7.0 multiverse" | sudo tee /etc/apt/sources.list.d/mongodb-org-7.0.list
Check the /etc/apt/sources.list.d/ to confirm if the repo list is added properly.
$ cat /etc/apt/sources.list.d/mongodb-org-7.0.listSTEP 5 – Update the package index.
$ sudo apt updateSTEP 6 – Install the mongodb-org package. The mongodb-org will install several packages related to the mongo shell, mongodb server, and database tools.
$ sudo apt install -y mongodb-org

The following additional packages will be installed:
mongodb-database-tools mongodb-mongosh mongodb-org-database mongodb-org-database-tools-extra mongodb-org-mongos mongodb-org-server mongodb-org-shell mongodb-org-tools
The following NEW packages will be installed:
mongodb-database-tools mongodb-mongosh mongodb-org mongodb-org-database mongodb-org-database-tools-extra mongodb-org-mongos mongodb-org-server mongodb-org-shell mongodb-org-tools
STEP 7 – Run the following commands one by one which will hold mongodb packages from upgrading when we do the full upgrade on Ubuntu packages.
$ echo "mongodb-org hold" | sudo dpkg --set-selections
$ echo "mongodb-org-database hold" | sudo dpkg --set-selections
$ echo "mongodb-org-server hold" | sudo dpkg --set-selections
$ echo "mongodb-mongosh hold" | sudo dpkg --set-selections
$ echo "mongodb-org-mongos hold" | sudo dpkg --set-selections
$ echo "mongodb-org-tools hold" | sudo dpkg --set-selections
STEP 8 – To connect with the mongodb database first you should check if the `mongod` service is running or not. You can use the systemctl command to check the status of the mongod service.
$ sudo systemctl status mongod

○ mongod.service - MongoDB Database Server
  Loaded: loaded (/lib/systemd/system/mongod.service; disabled; vendor preset: enabled)
  Active: inactive (dead)
  Docs: https://docs.mongodb.org/manual
In my case, the mongod service is not running. To start the service run the following command.
$ sudo systemctl start mongodYou can also use the is-active argument to check the service status.
$ sudo systemctl is-active mongod
active
If you wish the mongod service to start automatically after boot then run the following command.
$ sudo systemctl enable mongod
Created symlink /etc/systemd/system/multi-user.target.wants/mongod.service → /lib/systemd/system/mongod.service.
STEP 9 – Connect to the mongodb instance by launching the mongosh shell utility.
$ mongosh
At this moment we have not enabled the security for the mongodb instance. Let’s create a sample database called nixzie_test and insert a single document into a collection called sample_collection.
$ show dbs

$ use nixzie_test

$ db.sample_collection.insertOne( {“Message”: “Howdy” } )
{
  acknowledged: true,
  insertedId: ObjectId("6528ed1f41092236fec4a0e6")
}

$ db.sample_collection.find()
[ { _id: ObjectId("6528ed1f41092236fec4a0e6"), Message: 'Howdy' } ]
Now we can successfully connect with the mongodb database instance, create a database, and insert documents into a collection.
Create Admin User In MongoDB
The default configuration file for mongodb is mongod.conf which is located in the /etc/ directory.
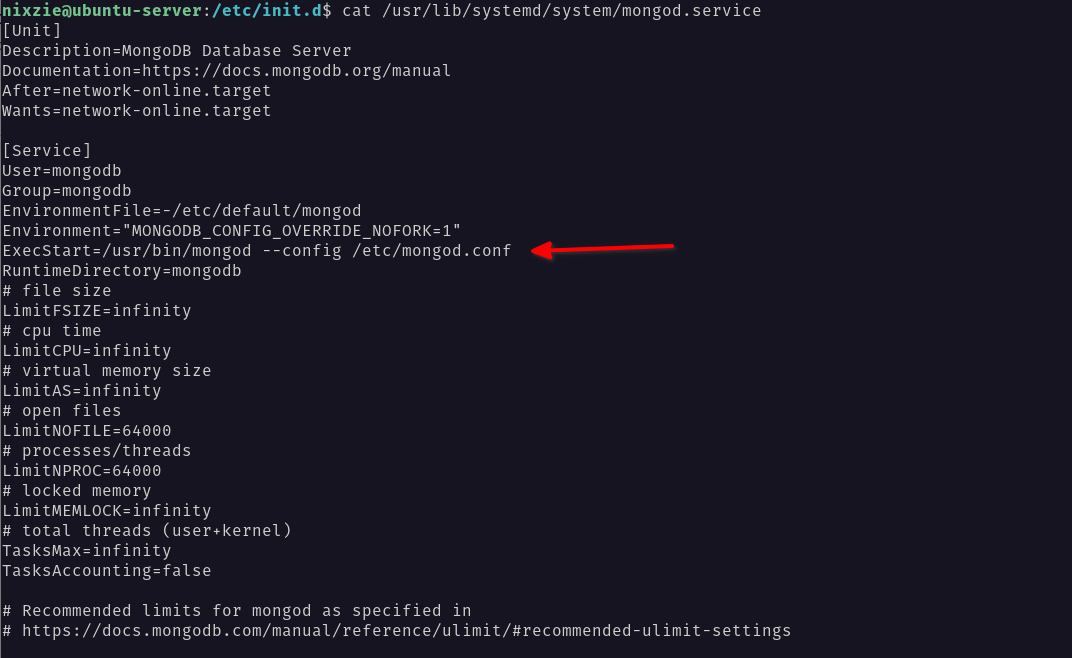
$ ls -l /etc/mongod.confWhen you start the mongod service using the systemctl command the mongod will use the /etc/mongod.conf as its configuration file. You can take a look at the ExecStart parameter in /usr/lib/systemd/system/mongod.service systemd unit file. This parameter shows the command that is used to start the service.
To enable the authentication, add the following configuration to /etc/mongod.conf file.
$ sudo vim /etc/mongod.conf
security:
  authorization: enabled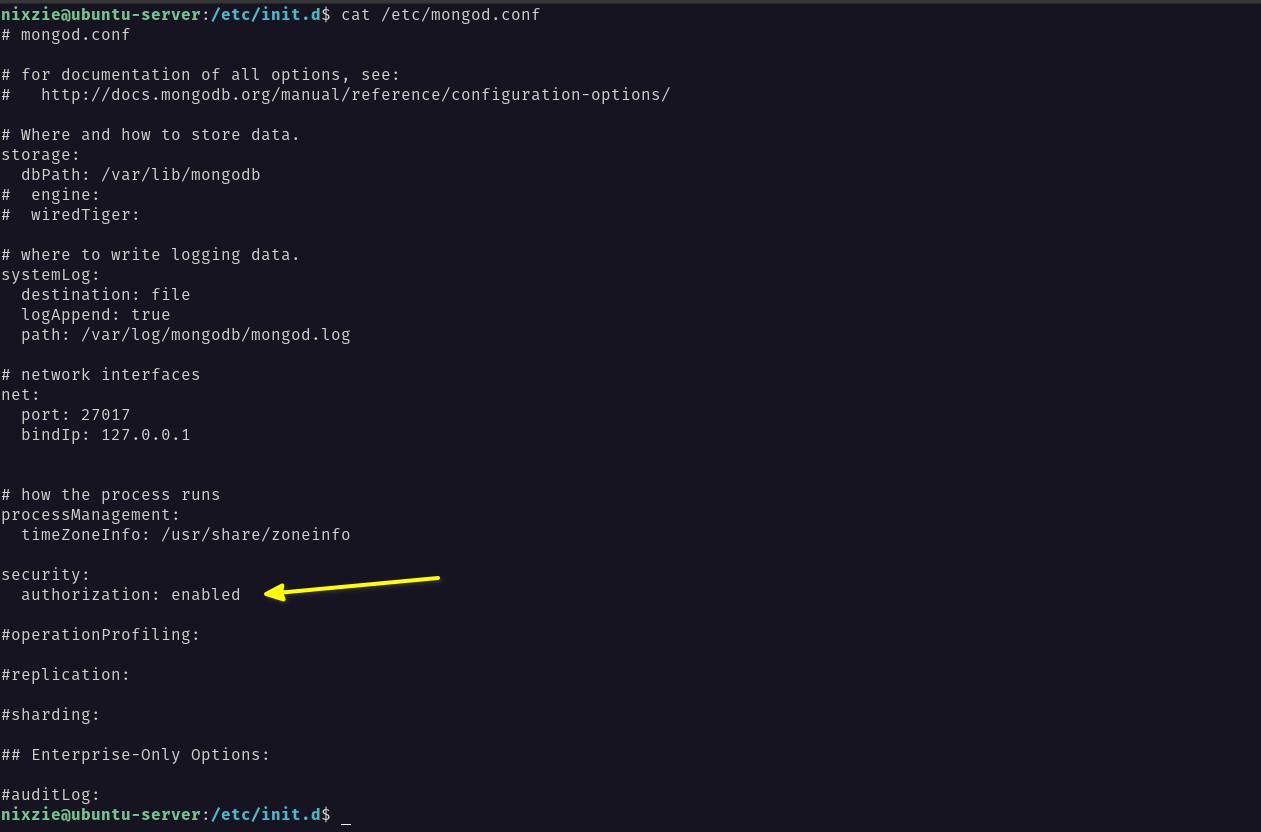
Now restart the mongod service for changes to be effective.
$ sudo systemctl restart mongodNow when you connect to the mongo shell and try to run any commands you will get an authentication error.
test> use admin;
switched to db admin
admin> show collections;
MongoServerError: Command listCollections requires authentication
You are allowed to create one user when the security is enabled. This is called a localhost exception. You have to connect to the mongodb instance from localhost and create the first user. If you try to create more than one user you will get an error. Let’s create a user called ‘admin’ with admin privileges. From within the mongosh run the following commands.
$ use admin
$ db.createUser( { user: "admin", pwd: ”password”, roles:[{ role: "root", db: "admin" }] } )
Now exit the mongosh and run the following command to connect to the admin database with authentication.
$ mongosh -u admin -p password --authenticationDatabase adminAlternatively, you can also authenticate within the mongosh utility.
$ mongosh
$ use admin
$ db.auth(“admin”,”password”)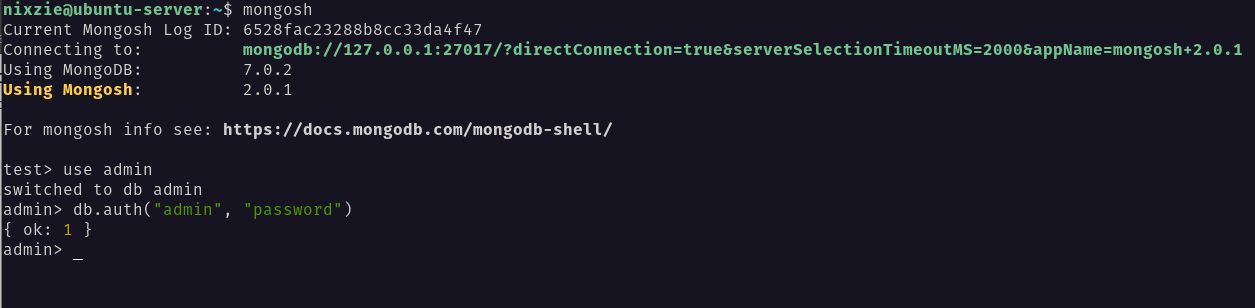
Now you can create other users with different privileges depending on your use case.
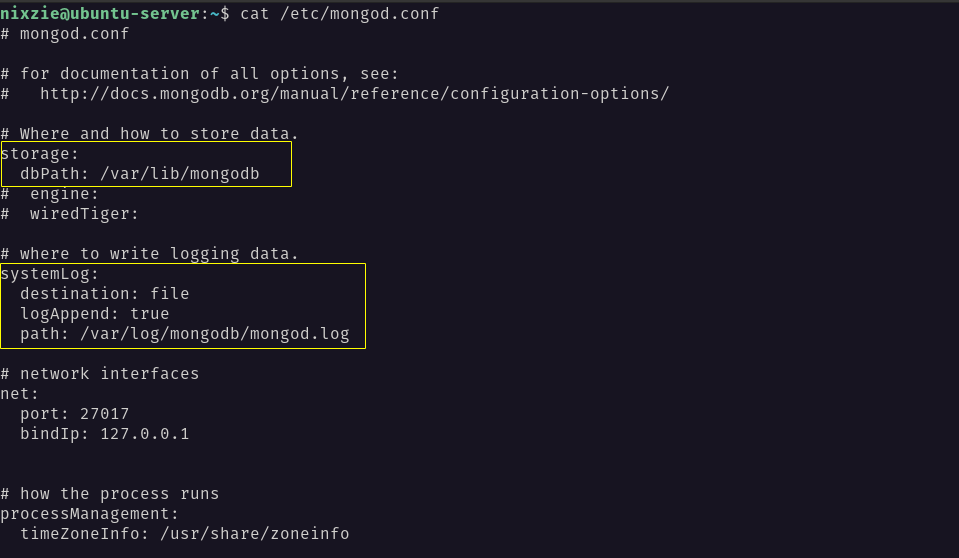
Data & Log File Location
The data file and the log files are created based on the path given in the conf file. You can check the conf file to get both data and log file location.
Wrap-Up
Now you should have a fair idea of how to set up mongoDB in the Ubuntu linux distribution. If you wish to automate all these steps then either you can create a shell script or use Vagrant which lets you automate VM provision and mongoDB database.